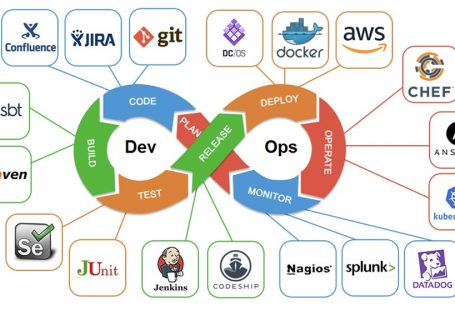
Nebula — это среда для облачного тестирования на проникновение DevOps. Он построен с модулями для каждого поставщика и каждой функции. По состоянию на апрель 2021 года он распространяется только на AWS, но в настоящее время является текущим проектом и, надеюсь, продолжит расширяться для тестирования GCP, Azure, Kubernetes, Docker или механизмов автоматизации, таких как Ansible, Terraform, Chef и т. д. Сдесь рассмотрим эксплуатацию Nebula — Cloud C2 Framework.
- S3 Bucket name bruteforce (брутфорс имени сегмента)
- IAM, EC2, S3, STS и лямбда-перечисление Использование
- IAM, EC2, STS и S3 Перечисление
- SSM + использование
- Пользовательский агент HTTP
- Enumerate Read Privileges (работает с правами записи)
- Reverse Shell
- Нет кредитов Разведка
В настоящее время существует 67 модулей, охватывающих:
- Разведка
- Перечисление
- Использование
- Очистка
- Обратная оболочка
Инсталяция
Docker
Из Dockerhub
Клонируйте Nebula Repo из Github и извлеките образ Nebula Docker:
git clone https://github.com/gl4ssesbo1/Nebula
docker pull gl4ssesbo1/nebula:latest
а затем запустите main.py через:
cd Nebula
docker run -v $(pwd):/app -ti gl4ssesbo1/nebula:latest main.py
Не забудьте опцию -v, потому что она позволяет сохранять файлы в системе даже после удаления образа докера.
Использование DockerFile
Клонируйте Nebula Repo из Github и создайте образ Docker локально:
git clone https://github.com/gl4ssesbo1/Nebula
docker build -t nebula .
docker run -v Nebula:/app -ti nebula main.py
Не забудьте опцию -v, потому что она позволяет сохранять файлы в системе даже после удаления образа докера.
Добавление сопоставления портов
Если вы хотите запустить оболочку, также добавьте параметр -p:
cd Nebula
docker run -p <host port>:<container port> -v $(pwd):/app -ti gl4ssesbo1/nebula:latest main.py
Установка в системе
Nebula написан на python3.8 и протестирован на python3.8 и 3.9. Он использует библиотеку boto3 для доступа к AWS. Для установки просто установите python 3.8+ и установите необходимые библиотеки из файла requirements.txt.
python3.8 -m pip install -r requirements.txt
Затем установите плагин диспетчера сеансов. Это необходимо для модулей SSM:
curl "https://s3.amazonaws.com/session-manager-downloads/plugin/latest/ubuntu_64bit/session-manager-plugin.deb" -o "session-manager-plugin.deb"
dpkg -i session-manager-plugin.deb
На устройствах Windows, поскольку less не установлен, я получил его с https://github.com/jftuga/less-Windows. Предварительно собранный двоичный файл сохраняется в каталоге less_binary. Просто добавьте этот каталог в переменную среду PATH, и все будет в порядке.
Затем просто запустите main.py
python3.8 ./main.py
Использование
python3.9.exe .\main.py -b
                -------------------------------------------------------------
                50 aws          0 gcp           0 azure         0 office365
                0 docker        0 kubernetes
                -------------------------------------------------------------
                50 modules      2 cleanup               0 detection
                41 enum         6 exploit               0 persistence
                0 listeners     0 lateral movement      0 detection bypass
                0 privesc       1 reconnaissance        0 stager
                -------------------------------------------------------------
()()(AWS) >>>
Помощь
Запустив команду справки, вы получите список команд, которые можно использовать:
()()(AWS) >>> help

    Help Command:               Description:
    -------------               ------------

    help                        Show help for all the commands
    help credentials            Show help for credentials
    help module                 Show help for modules
    help workspace              Show help for credentials
    help user-agent             Show help for credentials
    help shell                  Show help for shell connections


    Module Commands             Description
    ---------------             -----------

    show modules                List all the modules
    show enum                   List all Enumeration modules
    show exploit                List all Exploit modules
    show persistence            List all Persistence modules
    show privesc                List all Privilege Escalation modules
    show reconnaissance         List all Reconnaissance modules
    show listener               List all Reconnaissance modules
    show cleanup                List all Enumeration modules
    show detection              List all Exploit modules
    show detectionbypass        List all Persistence modules
    show lateralmovement        List all Privilege Escalation modules
    show stager                 List all Reconnaissance modules

    use module <module>         Use a module.
    options                     Show options of a module you have selected.
    run                         Run a module you have selected. Eg: 'run <module name>'
    search                      Search for a module via pattern. Eg: 'search s3'
    back                        Unselect a module
    set <option>                Set option of a module. Need to have the module used first.
    unset <option>              Unset option of a module. Need to have the module used first.


    User-Agent commands         Description
    -------------------         -----------

    set user-agent windows      Set a windows client user agent
    set user-agent linux        Set a linux client user agent
    set user-agent custom       Set a custom client user agent
    show user-agent             Show the current user-agent
    unset user-agent            Use the user agent that boto3 produces


    Workspace Commands          Description
    ------------------          -----------

    create workspace <wp>       Create a workspace
    use workspace <wp>          Use one of the workspaces
    remove workspace <wp>       Remove a workspace


    Shell commands              Description
    -------------------         -----------

    shell check_env             Check the environment you are in, get data and meta-data
    shell exit                  Kill a connection
    shell <command>             Run a command on a system. You don't need " on the command, just shell <command1> <command2>
Enum Privs
Если у вас есть набор учетных данных, вы можете ввести getuid, чтобы получить пользователя, или enum_user_privs, чтобы проверить разрешение на чтение набора учетных данных.
GetUID
(test)()(AWS) >>> getuid
------------------------------------------------
UserId: A******************Q
------------------------------------------------
        UserID: A******************Q
        Arn: arn:aws:iam::012345678912:user/user_user
        Account: 012345678912
[*] Output is saved to './workspaces/test/12_07_2021_02_22_54_getuid_dev_brian'
Если у него нет указанных ниже привилегий,
STS:GetUserIdentity
IAM:GetUser
IAM:ListAttachedUserPolicies
IAM:GetPolicy (for all policies)
[*] An error occurred (AccessDenied) when calling the GetUser operation: User: arn:aws:iam::012345678912:user/user_user is not authorized to perform: iam:GetUser on resource: user user_user
Enum_User_Privs
Эта команда проверяет список и описание привилегий для набора учетных данных.
(test)()(AWS) >>> enum_user_privs
User: user_user
        UserID: A******************Q
        Arn: arn:aws:iam::012345678912:user/user_user
        Account: 012345678912
--------------------------
Service: ec2
--------------------------
[*] Trying the 'Describe' functions:
[*] 'describe_account_attributes' worked!
[*] 'describe_addresses' worked!
[*] 'describe_aggregate_id_format' worked!
[*] 'describe_availability_zones' worked!
[*] 'describe_bundle_tasks' worked!
[*] 'describe_capacity_reservations' worked!
[*] 'describe_client_vpn_endpoints' worked!
[*] 'describe_coip_pools' worked!
[*] 'describe_customer_gateways' worked!
[*] 'describe_dhcp_options' worked!
[*] 'describe_egress_only_internet_gateways' worked!
^C[*] Stopping. It might take a while. Please wait.
[*] Output of the allowed functions is saved to './workspaces/test/12_07_2021_02_24_09_enum_user_privs'
[*] The list of the allowed functions is saved to './workspaces/test/12_07_2021_02_24_09_allowed_functions'
Модули
Листинг модулей
()()(AWS) >>> show modules
        cleanup/aws_iam_delete_access_key                                     Delete access key of a user by providing
                                                                                it.

        cleanup/aws_iam_delete_login_profile                                  Delete access of a user to the Management
                                                                                Console

        enum/aws_ec2_enum_elastic_ips                                         Lists User data of an Instance provided.
                                                                                Requires Secret Key and Access Key of an IAM that has access
                                                                                to it.

        enum/aws_ec2_enum_images                                              List all ec2 images. Needs credentials of an
                                                                                IAM with DescribeImages right. Output is dumpled on a file.
                                                                                It takes a sh*tload of time, unfortunately. And boy, is it a
                                                                                huge output.

        enum/aws_ec2_enum_instances                                           Describes instances attribues: Instances, VCP,
                                                                                Zones, Images, Security Groups, Snapshots, Subnets, Tags,
                                                                                Volumes. Requires Secret Key and Access Key of an IAM that
                                                                                has access to all or any of the API calls:
                                                                                DescribeAvailabilityZones, DescribeImages,
                                                                                DescribeInstances, DescribeKeyPairs, DescribeSecurityGroups,
                                                                                DescribeSnapshots, DescribeSubnets, DescribeTags,
                                                                                DescribeVolumes, DescribeVpcs
show module
     show enum
     show exploit
     show persistence
     show privesc
     show reconnaissance
     show listener
     show cleanup
     show detection
     show detectionbypass
     show lateralmovement
     show stager
Поиск модулей
Используйте команду поиска для поиска модулей по определенному слову:
()()(AWS) >>> search instance
        enum/aws_ec2_enum_instances                                           Describes instances attribues: Instances, VCP,
                                                                                Zones, Images, Security Groups, Snapshots, Subnets, Tags,
                                                                                Volumes. Requires Secret Key and Access Key of an IAM that
                                                                                has access to all or any of the API calls:
                                                                                DescribeAvailabilityZones, DescribeImages,
                                                                                DescribeInstances, DescribeKeyPairs, DescribeSecurityGroups,
                                                                                DescribeSnapshots, DescribeSubnets, DescribeTags,
                                                                                DescribeVolumes, DescribeVpcs

        enum/aws_iam_list_instance_profiles                                   List all the instance profiles.

        exploit/aws_ec2_create_instance_with_user_data                        You must provide policies in JSON format in
                                                                                IAM. However, for AWS CloudFormation templates formatted in
                                                                                YAML, you can provide the policy in JSON or YAML format. AWS
                                                                                CloudFormation always converts a YAML policy to JSON format
                                                                                before submitting it to IAM.

()()(AWS) >>>
Использование модулей
Чтобы использовать модуль, просто введите использование и имя модуля. В 3 скобках будет указано название модуля.
(work1)()(enum/aws_ec2_enum_instances) >>> use module enum/aws_iam_get_group
(work1)()(enum/aws_ec2_enum_instances) >>>
Опции
Используя опции, мы можем перечислить информацию о модуле:
(work1)()(enum/aws_ec2_enum_instances) >>> options
Desctiption:
-----------------------------
        Describes instances attribues: Instances, VCP, Zones, Images, Security Groups, Snapshots, Subnets, Tags, Volumes. Requires Secret Key and Access Key of an IAM that has access to all or any of the API calls: DescribeAvailabilityZones, DescribeImages, DescribeInstances, DescribeKeyPairs, DescribeSecurityGroups, DescribeSnapshots, DescribeSubnets, DescribeTags, DescribeVolumes, DescribeVpcs

Author:
-----------------------------
        name:   gl4ssesbo1
        twitter:        https://twitter.com/gl4ssesbo1
        github: https://github.com/gl4ssesbo1
        blog:   https://www.pepperclipp.com/

AWSCLI Command:
-----------------------------
        aws ec2 describe-instances --region {} --profile {}

Needs Credentials: True
-----------------------------

Options:
-----------------------------
        SERVICE:        ec2
                Required: true
                Description: The service that will be used to run the module. It cannot be changed.

        INSTANCE-ID:
                Required: false
                Description: The ID of the instance you want to enumerate. If not supplied, all instances will be enumerated.

(work1)()(enum/aws_ec2_enum_instances) >>>
Чтобы установить параметры, используйте набор и имя параметра:
(work1)()(enum/aws_ec2_enum_instances) >>> set INSTANCE-ID 1234
(work1)()(enum/aws_ec2_enum_instances) >>> options
Desctiption:
-----------------------------
        Describes instances attribues: Instances, VCP, Zones, Images, Security Groups, Snapshots, Subnets, Tags, Volumes. Requires Secret Key and Access Key of an IAM that has access to all or any of the API calls: DescribeAvailabilityZones, DescribeImages, DescribeInstances, DescribeKeyPairs, DescribeSecurityGroups, DescribeSnapshots, DescribeSubnets, DescribeTags, DescribeVolumes, DescribeVpcs

Author:
-----------------------------
        name:   gl4ssesbo1
        twitter:        https://twitter.com/gl4ssesbo1
        github: https://github.com/gl4ssesbo1
        blog:   https://www.pepperclipp.com/

Needs Credentials: True
-----------------------------

AWSCLI Command:
-----------------------------
        aws ec2 describe-instances --region {} --profile {}

Options:
-----------------------------
        SERVICE:        ec2
                Required: true
                Description: The service that will be used to run the module. It cannot be changed.

        INSTANCE-ID:    1234
                Required: false
                Description: The ID of the instance you want to enumerate. If not supplied, all instances will be enumerated.

(work1)()(enum/aws_ec2_enum_instances) >>>
(work1)()(enum/aws_ec2_enum_instances) >>> unset INSTANCE-ID
(work1)()(enum/aws_ec2_enum_instances) >>>
Запуск модуля
Needs Credentials: True
-----------------------------
Чтобы запустить его, просто введите run. В зависимости от вывода он будет либо отображать разбитое на страницы представление, либо просто распечатает его. При разбивке на страницы используется меньше двоичного кода, который для Windows использует двоичный файл из https://github.com/jftuga/less-Windows. Копия exe находится в каталоге less_binary. Вывод также сохраняется в файлах в каталоге рабочей области:
(work1)()(enum/aws_ec2_enum_instances) >>> run
[*] Content dumped on file './workspaces/work1/16_04_2021_18_16_48_ec2_enum_instances'.
Реквизиты для входа
#### Ввод учетных данных Nebula может использовать комбинацию AccessKeyID + SecretKey и комбинацию AccessKeyID + SecretKey + SessionKey для аутентификации в инфраструктуре. Чтобы вставить набор учетных данных, используйте:
()()(AWS) >>> set credentials test1
Profile Name: test1
Access Key ID: A*********2
Secret Key ID: a****************************7
Region: us-west-3

Do you also have a session token?[y/N]
[*] Credentials set. Use 'show credentials' to check them.
[*] Currect credential profile set to 'test1'.Use 'show current-creds' to check them.
И вы получите несколько входов, позволяющих их установить. Токен сеанса можно добавить при вводе учетных данных, введя y, когда его спросят. У вас также есть токен сеанса? [Y / N].
()()(AWS) >>> use credentials test1
[*] Currect credential profile set to 'test1'.Use 'show current-creds' to check them.
####Текущие учетные данные. Когда вы вводите учетные данные, они автоматически становятся текущими учетными данными, то есть теми, с которыми вы будете проходить аутентификацию. Чтобы проверить текущие учетные данные, используйте:
()()(AWS) >>> show current-creds
{
    "profile": "test1",
    "access_key_id": "A*********2",
    "secret_key": "a****************************7",
    "region": "us-west-3"
}
####Удаление учетных данных. Если вам не нужны учетные данные, вы можете удалить их, используя:
()()(AWS) >>> remove credentials test1
You are about to remove credential 'test1'. Are you sure? [y/N] y
#### Выгрузка и импорт учетных данных. Если вы хотите, чтобы ваши учетные данные были сохранены на машине, вы можете использовать:
()()(AWS) >>> dump credentials
[*] Credentials dumped on file './credentials/16_04_2021_17_37_59'.
И они будут сохранены в файле, содержащем время и дату дампа учетных данных каталога в каталоге Nebula. Чтобы импортировать их, просто введите:
()()(AWS) >>> import credentials 16_04_2021_17_37_59
()()(AWS) >>> show credentials
[
    {
        "profile": "test1",
        "access_key_id": "A*********2",
        "secret_key": "a****************************7",
        "region": "us-west-3"
    }
]
Рабочие пространства
Nebula использует рабочие пространствадля сохранения вывода каждой команды. Вывод сохраняется как данные json (за исключением s3_name_fuzzer, который сохраняет его как XML) в папке, созданной в рабочих областях каталогов.
Создать рабочие места
()()(AWS) >>> create workspace work1
[*] Workspace 'work1' created.
[*] Current workspace set at 'work1'.
(work1)()(AWS) >>> ls ./workspaces


    Directory: C:\Users\***\Desktop\Nebula\workspaces


Mode                 LastWriteTime         Length Name
----                 -------------         ------ ----
d-----         4/16/2021   5:42 PM                work1
-a----         4/16/2021   4:40 PM              0 __init__.py
При создании первые скобки будут содержать название рабочего пространства, над которым вы работаете. Если вы хотите использовать существующее рабочее пространство, просто введите:
()()(AWS) >>> use workspace work1
(work1)()(AWS) >>>
Необходимо использовать рабочие пространства, поэтому, даже если вы не используете их в данный момент, при запуске модуля он попросит вас создать его со случайным именем или просто создать его с настраиваемым именем самостоятельно.
()()(enum/aws_ec2_enum_instances) >>> run
A workspace is not configured. Workstation 'qxryiuct' will be created. Are you sure? [y/N] n
[*] Create a workstation first using 'create workstation <workstation name>'.
()()(enum/aws_ec2_enum_instances) >>>
Список рабочих пространств
Чтобы получить список рабочих пространств, используйте:
(work1)()(enum/aws_ec2_enum_instances) >>> show workspaces
-----------------------------------
Workspaces:
-----------------------------------
        work1

(work1)()(enum/aws_ec2_enum_instances) >>>
Удаление рабочих пространств
Чтобы удалить рабочее пространство, введите:
()()(AWS) >>> remove workspace work1
[*] Are you sure you want to delete the workspace? [y/N] y
()()(AWS) >>> show workspaces
-----------------------------------
Workspaces:
-----------------------------------

()()(AWS) >>>
Обратная оболочка
Чтобы создать обратную оболочку, вам нужно создать стейджер и запустить listener. Чтобы использовать эту функцию, вам необходимо запустить Nebula от имени пользователя root (чтобы открывать порты).
Stager
Чтобы сгенерировать стейджер, используйте модули в стейджерах:
()()(AWS) >>> use module stager/aws_python_tcp
()()(stager/aws_python_tcp) >>> options
Desctiption:
-----------------------------
        The TCP Reverse Shell that is used by listeners/aws_python_tcp_listener

Author:
-----------------------------
        name:   gl4ssesbo1
        twitter:        https://twitter.com/gl4ssesbo1
        github: https://github.com/gl4ssesbo1
        blog:   https://www.pepperclipp.com/

Needs Credentials: False
-----------------------------

AWSCLI Command:
-----------------------------
        None

Options:
-----------------------------
        SERVICE:        none
                Required: true
                Description: The service that will be used to run the module. It cannot be changed.

        HOST:
                Required: true
                Description: The Host/IP of the C2 Server.

        PORT:
                Required: true
                Description: The C2 Server Port.

        FORMAT:
                Required: true
                Description: The format of the stager. Currently only allows 'py' for Python and 'elf' for ELF Binary.

        CALLBACK-TIME:  None
                Required: true
                Description: The time in seconds between callbacks from Stager. The Stager calls back even if the server crashes or is stoped in a loop.

        OUTPUT-FILE-NAME:
                Required: true
                Description: The name of the stager output file.
Варианты заполнения:
- HOST: IP-адрес или домен сервера C2.
- Порт: порт сервера C2
- Формат: в настоящее время поддерживает только необработанный файл Python и двоичный файл elf.
- Callback-Time: время в секундах, в течение которого сеансы должны перезвонить. Он выполняет обратный вызов, даже если текущий сеанс запущен, и даже если сервер выходит из строя или закрывается, так что вы не потеряете доступ к машине.
- Имя выходного файла: имя выходного файла.
При запуске модуля будет создан stager, сохраненный в ./workspaces/workspacename/stagername.
Listener (слушатель)
Listener прост. Просто настройте Host (по умолчанию 0.0.0.0) и Port, и он создаст сервер. Чтобы запустить прослушиватель, вам нужно, чтобы Nebula запускалась от имени пользователя root.
()()(stager/aws_python_tcp) >>> use module listeners/aws_python_tcp_listener
()()(listeners/aws_python_tcp_listener) >>> options
Desctiption:
-----------------------------
        TCP Listener for Reverse Shell stagers/aws_python_tcp

Author:
-----------------------------
        name:   gl4ssesbo1
        twitter:        https://twitter.com/gl4ssesbo1
        github: https://github.com/gl4ssesbo1
        blog:   https://www.pepperclipp.com/

Needs Credentials: False
-----------------------------

AWSCLI Command:
-----------------------------
        None

Options:
-----------------------------
        SERVICE:        none
                Required: true
                Description: The service that will be used to run the module. It cannot be changed.

        HOST:   0.0.0.0
                Required: true
                Description: The Host/IP of the C2 Server.

        PORT:
                Required: true
                Description: The C2 Server Port.
Пользовательские агенты
Пользовательские агенты могут быть настроены как Linux, Windows или пользовательские. Чтобы показать их, просто используйте show.
()()(AWS) >>> set user-agent linux
User Agent: Boto3/1.9.89 Python/3.8.1 Linux/4.1.2-34-generic was set
()()(AWS) >>> show user-agent
[*] User Agent is: Boto3/1.9.89 Python/3.8.1 Linux/4.1.2-34-generic
()()(AWS) >>> set user-agent windows
User Agent: Boto3/1.7.48 Python/3.9.1 Windows/7 Botocore/1.10.48 was set
()()(AWS) >>> show user-agent
[*] User Agent is: Boto3/1.7.48 Python/3.9.1 Windows/7 Botocore/1.10.48
()()(AWS) >>> set user-agent custom
Enter the User-Agent you want: sth
User Agent: sth was set
()()(AWS) >>> show user-agent
[*] User Agent is: sth
()()(AWS) >>>
()()(AWS) >>> unset user-agent
[*] User Agent set to empty.
Заключение
Платформа позволяет организовать функционирование распределенной инфраструктуры для динамично развернутых многоуровневых сервисов (групп из взаимосвязанных виртуальных машин), комбинируя ресурсы локального дата-центра и внешних облачных провайдеров. В частности, OpenNebula позволяет на своих мощностях поднять инфраструктуру для предоставления сервисов IaaS (инфраструктура как сервис), похожую на Amazon EC2. В наличии имеются средства для организации развертывания виртуальных окружений, мониторинга, контроля доступа, обеспечения безопасности и управления хранилищем.


